An amazing adventure at Ängsbacka
Wow! just got back from an amazing adventure at Ängsbacka Kursgård, in Värmland Sweden.
What started of as an idea providing workshops in natural building ended up in an amazing playhouse for the children. Here is what happened the last 6 weeks.
The Global Ecovillage Network Conference (GEN) was going to be held at Ängsbacka this year and since it is a Conference, I thought it would be nice to offer some HANDS-ON workshops and let people experience the wonders of dancing in clay and building with it.
After the initial idea (building a cob Pizza oven together) was turned into working on a playhouse for children, I got my idea’s down in Sketch-up (a 3D modeling programme on the pc). I like to see any structure to be PART OF the landscape, instead of ‘put on’, and thus I strive to work with material that is already there, coming from the land but also to re-use and recycle material as much as possible to keep costs down. I therefore used my sketch more as a guideline and the further we got into the process, the more we moved away from the initial drawing, which was for the better of course.
 Foundation
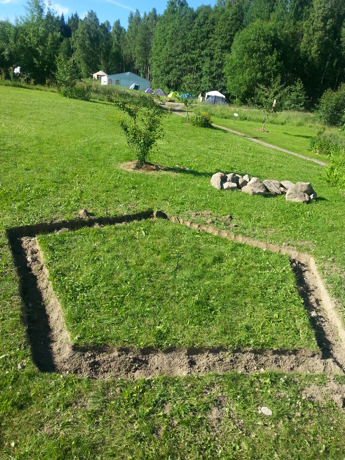
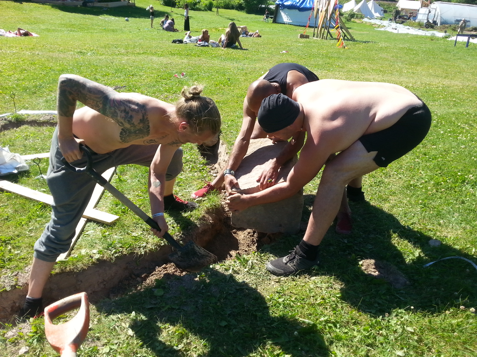
As with any foundation you preferably go down to below frostline. Since we are in Sweden this is around 1,20 m. (!) below the surface and therefore I decided a few big rocks surrounded by gravel would suffice. Around 30 cm below the surface we found a hard clay-pan, stable enough to carry the big rocks. As with any naturally build structure you want to give it ‘a good hat and good boots’ to keep the moisture away from your walls. And thus the rocks are sticking up about 15-20 cm above the soil so moisture does not creep up from below. Unfortunately we didn’t find enough big stones for the whole foundation, so only the five corner posts got a big stone. The smaller stones in the middle were puzzled together to provide the elevation, making sure to use as little as possible sand-clay mortar. You DON’T use the mortar as glue. You use it to keep the stones from rocking. So the forces are carried down stone to stone. The more mortar you use the more chance there is that it touches the ground and moisture wicks up into your building.
 Frame
Frame
After the foundation was put in. It was time for the 3.5m re-used wooden poles to go up. We secured them with metal 90° angles and french screws with plugs to the rocks and also a lot of scrap wood to keep them up. For straightening out the poles, it’s important to go round, one by one. You’ll curse a lot, since they move a bit when you move another pole, BUT it’s worth it! After straightening, I put a laserlevel in the middle to get a reference point on all the poles. Since the ground is sloping, the rocks are of unequal height and the poles where sometimes not all that straight.
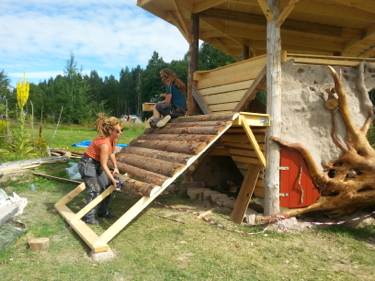
Roof
The roof is very important to keep the rain of the walls and to keep dry inside of course. The origional drawing had a pointy roof, but as I thought a living roof would be nicest in the landscape, we changed it to be a flat but angled roof (so it drains the water).
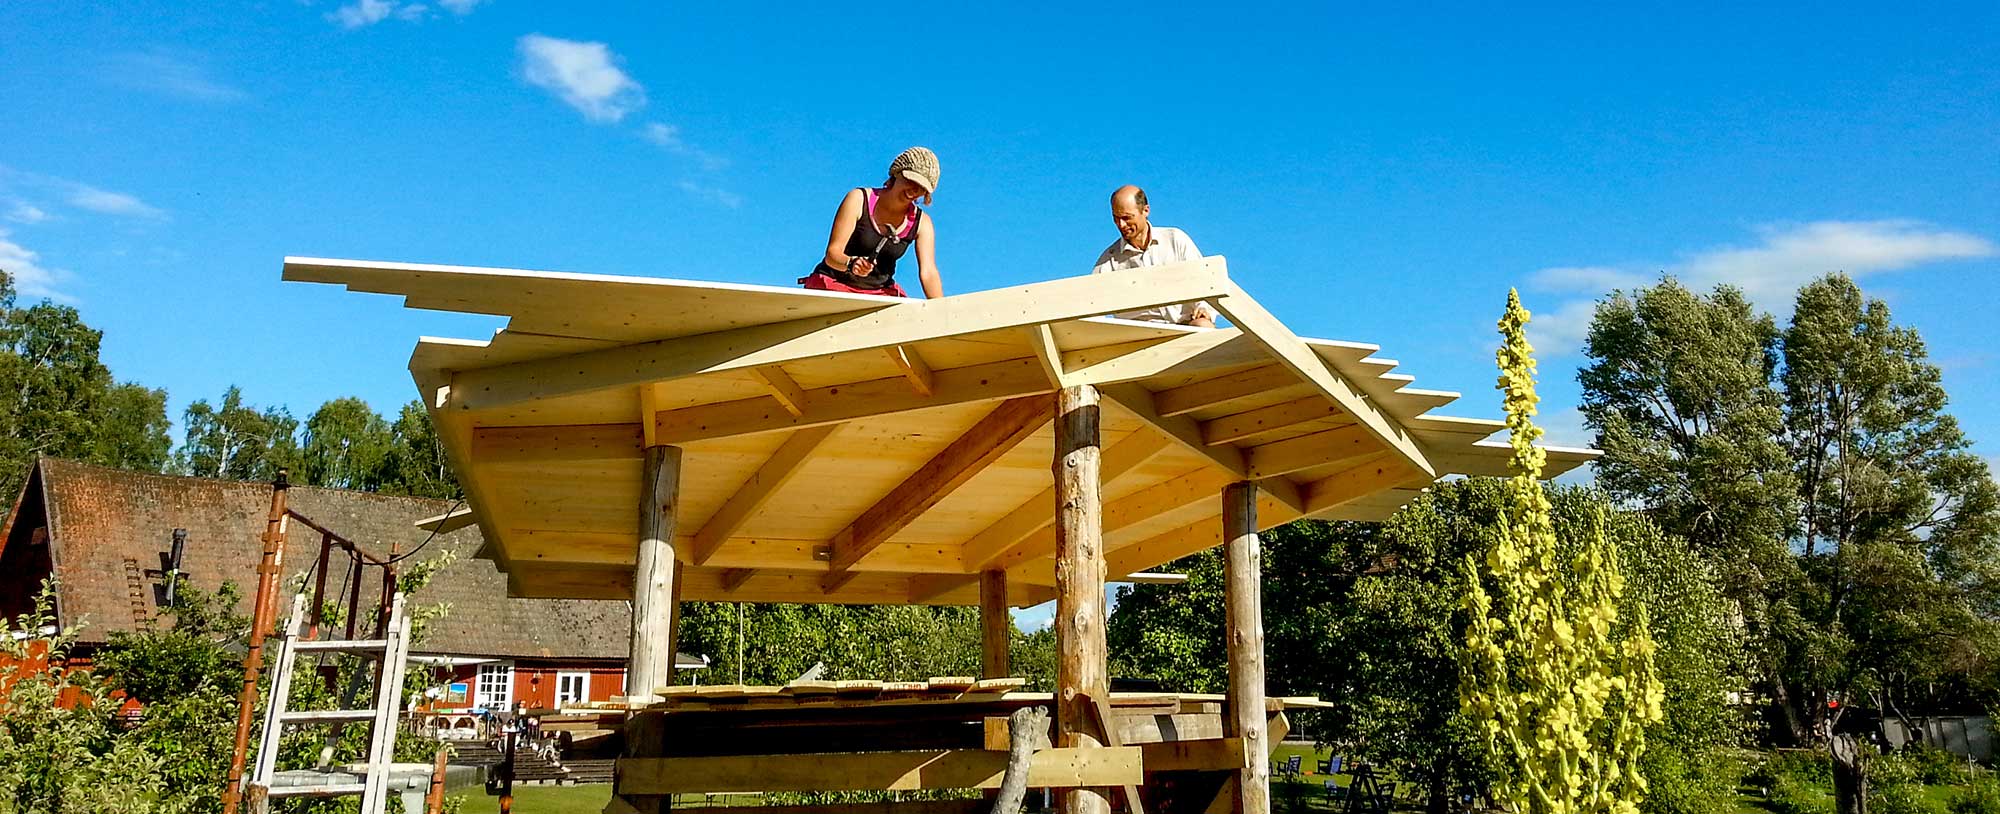 When considering a living roof you have to decide which kind of moisture barrier you are going to use. Traditionally, about 15 layers of birchbark was used in Scandinavian countries. Another option is to use EPDM Pondliner, with softening (old carpet for example) before and after the liner. The last option is to go for the commercial products specially designed for green roofs. Though my heart would love to try out the birch method, Ängsbacka trusted more in the modern techniques and we choose to go for ‘Platon Xtra Matta för Torvtak’. Never did I have so much toxic shit on my hands for a ‘green roof’. The roof overhang is about 90 cm +10 cm with the roofing boards. The roof was strenghtened with 10 8×8 cm diagonals, 2 coming from each pole.
 Walls
Walls
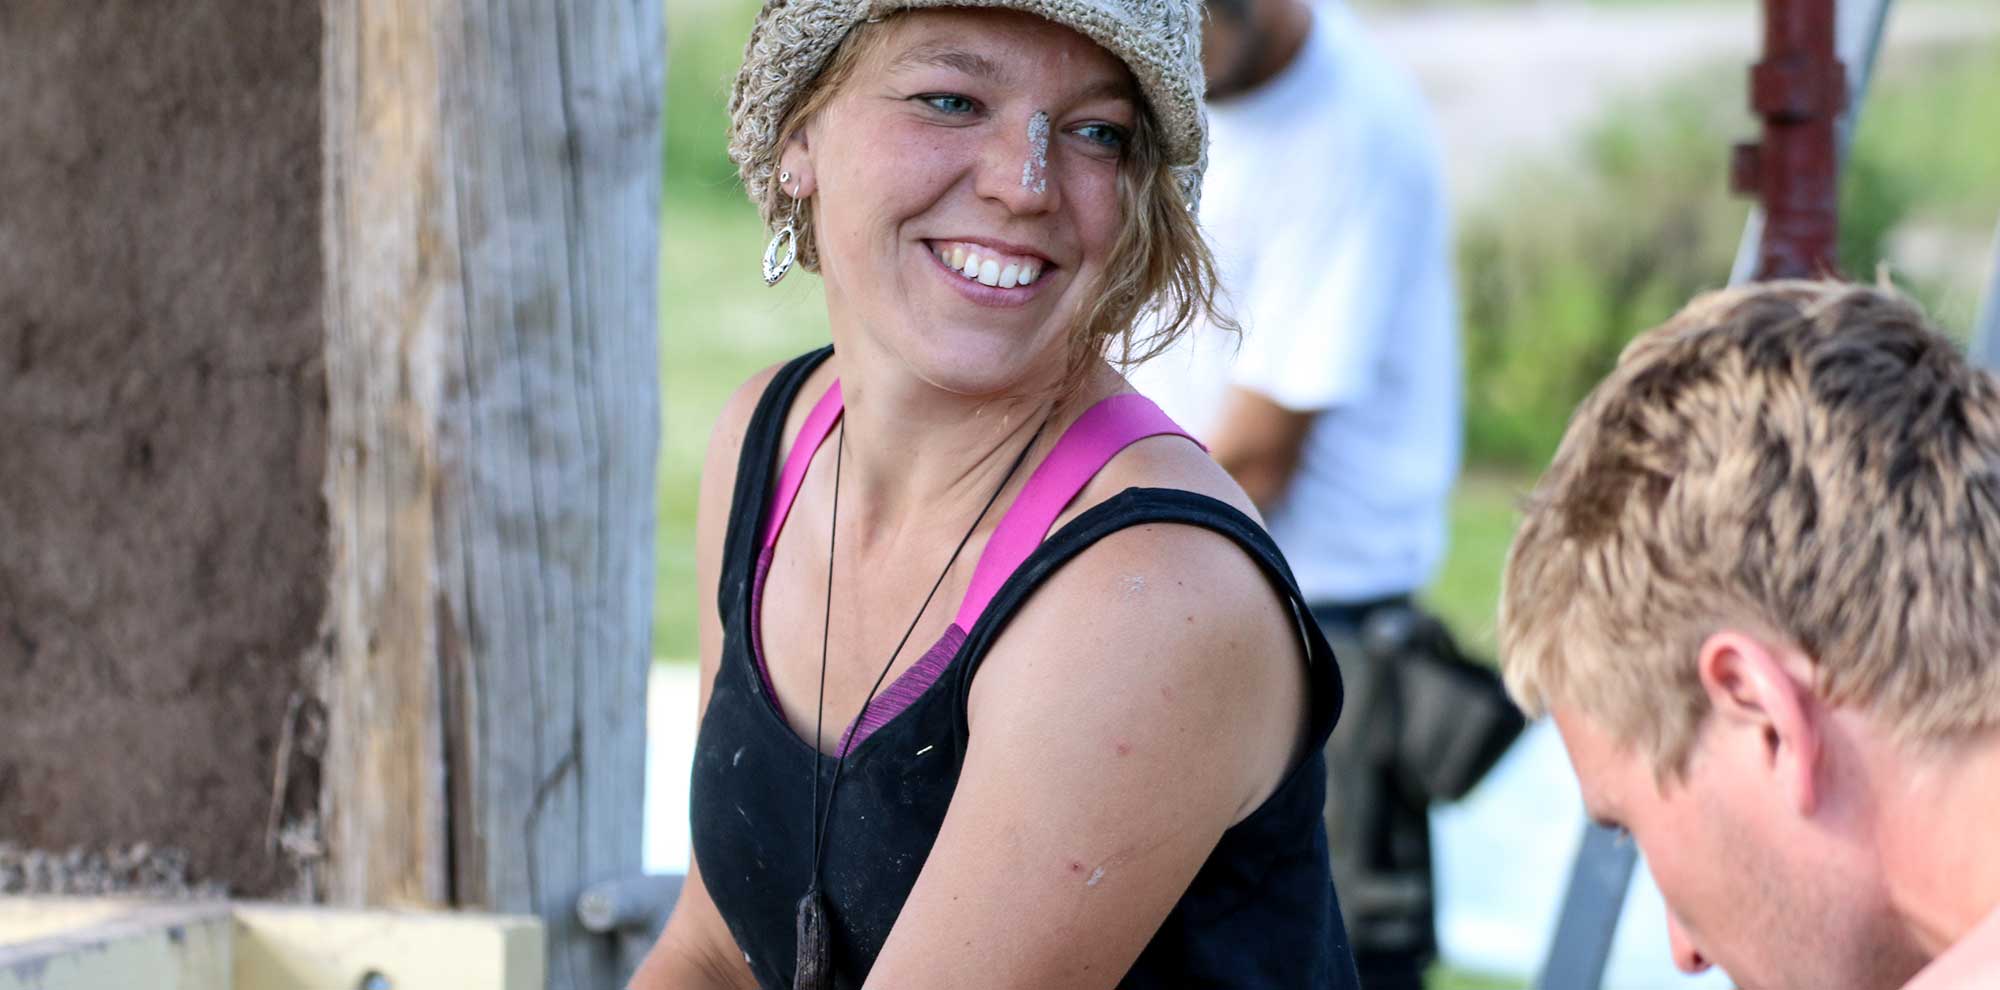
The part we’ve all been waiting for! Filling in the walls with different techniques during GEN.
Everyday from 11:00h to 13:00h participants where invited to come and get their hands dirty. And with great success!
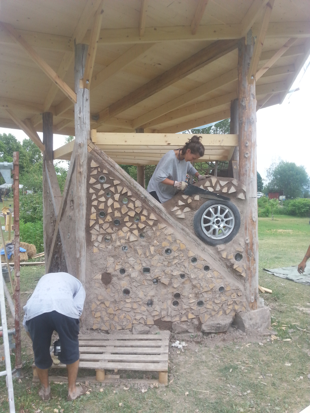
Making Cob
We had made a ‘pool’ so the clay could soak a few days before we took it out and danced in it on a tarp together with sand (ratio 1:3). I don’t believe in recipes, not for cooking not for building. I believe in tasting or in testing. For more on how to test your soil. Click here (still to be written). Depending on which wall we were going to use the cob, we added more water and/or straw. The clay is quite pure and comes straight out of Ängsbacka soil, the sand from the sandpit, delivered by the neighbor. Mid grain, sharp, not rounded beach sand. By mixing on a tarp we are more efficient, rolling the material on top of each other by pulling the tarp, after which it is irresistable for most not to jump in it!
Cordwood
A technique mostly found in places of the earth where there are a lot of trees and it is sometimes claimed to be the perferct combination of thermal mass and insulation, cordwood definitely needed to be demonstrated here. Just clay and sand as a mortar and dipping the dry firewood into a bucket of water (to make it ‘like’ the clay better), it is a fairly simple technique and you can build quite fast. We put big jars with lids on them in the walls, so the children can put in their treasures.
 Wattle and daub
The hungry-for-clay-participants made a frame of strong and bendy wood (called ‘wattle’ after the wattle tree:acacia), resp. birch and willow, to then fold over the ‘pancakes’ (the ‘daub’) made out of sand, clay and straw and work together with their partner on the other side to squeeze the them together. The straw in the mix will hang over the willow like clothes on a washing line. Making it much stronger, in my opinion, than if you push it in from both side of the frame. Nice little details in the form of glass jars were added to let in light.
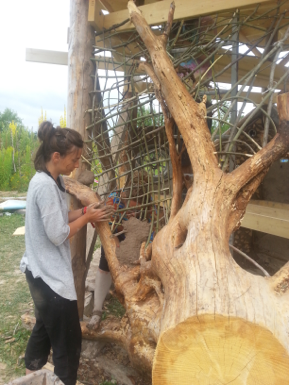
Organically shaped Wattle and Daub
This was new to me too, but there was no reason it wouldn’t work so hey let’s just try it! As you may have seen, a tree rootsystem had appeared in of the sides. Since I wanted to have something with curvy wood for the entrance, the Universe provided us with a beautiful rootsystem! We even extended some roots so they reach the building again. The tree is oiled to slow down Natures cleaning up process and we made a little magic red door as an entrance.
Cob
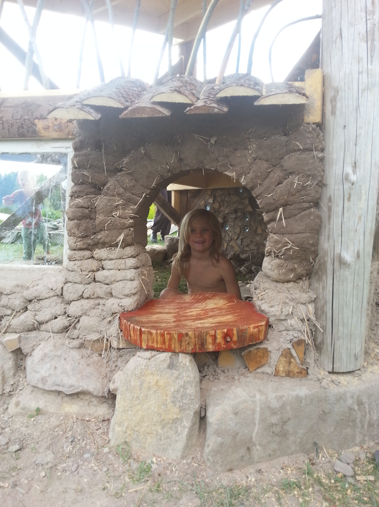
The last technique to be practised was ‘cobbing’. Making ‘loaves’ of our mixture, again clay, sand and straw, but this time with less water, and stack them up. Making sure the joints are not at the same place as the previous row, just as with bricking. Every time a row is done, we push down with a wooden peg to push the straw from the new layer, into the previous layer, so they are vertically connected with loops of straw. I wanted a little opening where the children could play ‘shop’ or something and thus I found a space holder in the form of a planterbox. Once the cob on top was dry the planterbox was removed and voila the arch holds. Look at how the cobs are shaped in order to form a more stabel arch. Don’t forget to lift your spaceholder up a bit, and put newspaper around it, So when it is time to remove the spaceholder, it can physically drop down AND is NOT stuck to the clay. The paper will be but that is easily peeled off.
   |
Soon I’ll fill you in on the rest of the build
We are still looking for a slide, to go down of the first floor. If you’ve got any possible links to one, please contact me. Needs to be in Sweden and within a month from writing. Tack!
Trackback from your site.